
Table of Contents
- Why Recessed Lighting Works for Las Vegas Homes
- Recessed Lighting Types: Can Lights vs. Retrofit Fixtures
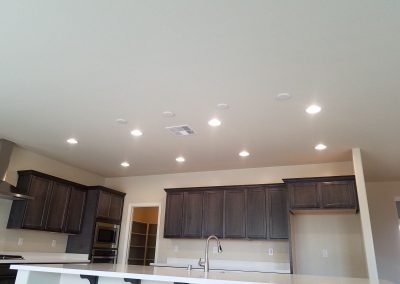
- Recessed Lighting Layout for Living Rooms and Kitchens
- Selecting a Recessed Lighting Electrician in Las Vegas
- Recessed Lighting Dimmer Switch Installation and Controls
- What to Expect During Professional Installation
- Frequently Asked Questions
Last Updated: October 18, 2026
Why Recessed Lighting Works for Las Vegas Homes
Recessed lighting installation has become one of the most popular electrical upgrades for homeowners across the Las Vegas Valley.
Recessed lights sit flush with the ceiling for a clean look in almost any room.
Beyond appearance, recessed lights let you layer general, task, and accent lighting in one room so brightness matches how you use each space.
The most common question homeowners ask is whether to choose traditional can lights or newer canless fixtures.
Recessed Lighting Types: Can Lights vs. Retrofit Fixtures
Each type has distinct installation requirements, performance characteristics, and compatibility with different ceiling conditions. Professional electrician installing recessed light fixture in white ceiling, showing trim ring detail and proper positioning in modern residential interior
Traditional Can Lights
Can lights, also called recessed cans or housing units, are the industry standard for recessed lighting installation.
Can lights work in most ceiling types and come in different depths to fit various ceiling cavities. They accept incandescent, CFL, and LED bulbs, so you aren’t locked into replacing fixtures later.
The main consideration with can lights is insulation handling.
Canless Recessed Lighting Installation
Canless recessed fixtures, sometimes called “low-profile” or “slim” recessed lights, eliminate the housing entirely.
Canless fixtures require less ceiling depth, often just 2-3 inches compared to 6-8 inches for traditional cans, making them ideal for retrofits into finished ceilings. They also run cooler, which matters in Las Vegas homes.
The trade-off is that canless fixtures typically come with fixed LED bulbs, so end of life means replacing the entire fixture. Quality LED fixtures last 25,000-50,000 hours, roughly 15-20 years of typical use.
Recessed Lighting Layout for Living Rooms and Kitchens
Layout is where most recessed lighting projects succeed or fail. Two homes can use identical fixtures and get completely different results because one placed them by eye and the other placed them by ceiling height, beam spread, and room use.
Start with ceiling height and beam spread
The biggest layout variable is ceiling height. A common rule of thumb is to space recessed lights roughly half the ceiling height apart: about 4 feet on an 8-foot ceiling, 5 feet on a 10-foot ceiling, and 6 feet on a 12-foot ceiling.
Beam spread matters just as much. Most residential recessed fixtures throw a cone of roughly 60 to 120 degrees depending on trim and reflector. Narrow beams suit accenting art or a counter; wide beams suit general illumination.
Keep fixtures off the walls and out of the corners
A common mistake is placing recessed lights too close to walls, which creates a hot spot on the wall and leaves the center of the room dark. Keep fixtures at least 2 to 3 feet off the walls and out of corners, then adjust for furniture. With tall cabinets or built-ins, increase the offset so light lands on the cabinet face.
Kitchen layout: task first, ambient second
Kitchens are the most layout-sensitive room because the lighting has to serve several jobs at once:
- Over the work triangle. Place fixtures over the sink, the primary prep area, and the range so light lands on the counter, not behind the person standing at it. A fixture directly over the sink is standard; over the cooktop is usually avoided because of heat and steam, so offset it slightly.
- Over the island or peninsula. A row of two or three fixtures centered on the island gives focused light for prep and dining. Space them evenly along the island’s long axis.
- Perimeter ambient. A ring of wider-beam fixtures around the room’s perimeter fills in general illumination so the task lights aren’t doing all the work.
- Under-cabinet task lighting. Recessed ceiling lights alone rarely light the counter directly beneath upper cabinets. Pairing them with under-cabinet strip lighting is the standard solution and should be planned at the same time so the switching makes sense.
Living room layout: layer, don’t grid
Living rooms usually look better with layered lighting than a uniform grid:
- Ambient layer. A small number of wide-beam fixtures provide general light for the room as a whole.
- Task layer. A fixture or two positioned over reading chairs or a sofa end gives focused light where people actually sit.
- Accent layer. Narrow-beam fixtures aimed at art, a fireplace, or a feature wall add depth and let you dim the ambient layer without the room going flat.
Avoid placing a fixture directly over the center of a seating area if people will be looking up at it, offset it slightly so the light falls on the seating rather than into eyes.
Bedroom layout: soft and controllable
Bedrooms benefit from fewer, softer fixtures. Two to four wide-beam fixtures on a dimmer usually cover a standard bedroom. Keep fixtures off the head of the bed so light doesn’t shine directly down on pillows, and consider a separate switched circuit or dimmer for the reading side of the room.
Obstacles that change the plan
Before any layout is final, the ceiling has to be checked for obstacles: HVAC ducts, structural beams, plumbing stacks, and existing wiring runs. A licensed electrician locates these before marking fixture positions, because moving a light two feet to clear a duct is easy before the hole is cut and expensive afterward. In older homes, joist spacing and attic insulation depth can also limit placement.
Confirm the layout before cutting
The most valuable step is marking fixture locations on the ceiling and walking the room with the homeowner before any drywall is opened. Look at the marks from the doorway and from the main seating or work positions, and adjust before the first hole is cut. This is the cheapest possible time to change your mind.
If you’re planning recessed lighting in a Las Vegas home and want the layout right the first time, Dead On Electrical Services can walk your rooms, check the ceiling for obstacles, and mark a layout for your approval before any work begins. Call (725) 605-6888 to schedule a consultation.
Selecting a Recessed Lighting Electrician in Las Vegas
Most homeowners hire a recessed lighting installer once, so there’s no experience to fall back on. The difference between a clean, code-compliant install and a ceiling full of problems usually comes down to how carefully you vet the contractor before any drywall is cut.
Verify the license, not just the logo
Electrical contracting in Nevada is licensed at the state level through the Nevada State Contractors Board. Ask for the license number and look it up on the Board’s public license search. Confirm the license is active, the classification covers the work, and the name matches the company bidding your job.
Confirm insurance and workers’ compensation
Ask for a certificate of general liability insurance and proof of workers’ compensation coverage, sent directly from the insurer or agent rather than a photocopy from the contractor. If an uninsured worker is injured in your attic, the exposure can follow you as the homeowner.
Ask who pulls the permit
Recessed lighting that adds circuits, relocates wiring, or involves new ceiling openings often requires an electrical permit, and the permit should be pulled by the licensed contractor in the company’s name, not by the homeowner. Ask directly: “Will you pull the permit, and will the work be inspected?” A contractor who suggests skipping the permit to save time is telling you how they handle the rest of the job.
Get a written, itemized estimate
A one-line quote is not an estimate. Ask for a written scope listing the number of fixtures, fixture type (can versus canless), whether new wiring or a new circuit is included, whether dimmers are included, whether drywall patching and paint touch-up are included, and what the exclusions are.
Read reviews for the right signals
Sort reviews by newest and read the middle of the distribution, not just the five-star highlights. Look for patterns: did the crew show up when scheduled, was the layout confirmed before cutting, was the site cleaned up, and did the result match the estimate. One bad review is noise; three mentioning the same problem is a pattern.
Ask about warranty and callbacks
Ask what happens if a fixture fails or a dimmer buzzes after the job is done. A contractor who stands behind the work will describe a callback process in plain terms. Get the warranty terms in writing as part of the estimate.
Questions worth asking on the phone
- Are you licensed and insured in Nevada, and can you send the license number and certificate?
- Will you pull the permit, and is inspection included?
- Do you handle drywall patching, or is that a separate trade?
- How do you confirm fixture placement before cutting?
- What is your callback policy if something isn’t right?
A contractor who answers these clearly and quickly is usually the one you want in your ceiling. One who deflects or rushes past them is telling you something useful before the job even starts.
Dead On Electrical Services is a licensed electrical contractor serving the Las Vegas Valley, and we are happy to provide license and insurance information, walk you through the permit process, and put the scope of your recessed lighting project in writing before any work starts.
Recessed Lighting Dimmer Switch Installation and Controls
Not all recessed lights work with dimmers.
When planning a recessed lighting dimmer switch installation, confirm fixture and bulb compatibility with your electrician.
Dimmer placement matters too. In a living room, a dimmer near the main seating area lets you adjust lighting without getting up.
Modern dimmers also offer fade-in capability, gradually brightening rather than flashing to full brightness, which works well in bedrooms.
What to Expect During Professional Installation
Recessed lighting installation typically takes one to three days depending on the number of fixtures, ceiling type, and layout complexity.
The first step is confirming fixture locations.
Next comes rough-in: cutting ceiling openings, running wiring, and installing housings.
The final step is trim installation and bulb placement.
Recessed lighting installation is a significant upgrade that transforms how your Las Vegas home looks and feels.
If you’re ready to explore recessed lighting options for your home, Dead On Electrical Services can help.
Frequently Asked Questions
How do I choose a recessed lighting electrician in Las Vegas?
Look for a licensed electrician with experience in residential lighting installations. Verify they hold a current Nevada electrical license, carry liability insurance, and can provide references from recent projects. Ask about their familiarity with local building codes and whether they pull permits for the work. A qualified recessed lighting electrician in Las Vegas will discuss layout, fixture compatibility, and dimmer pairing before starting the job.
Can recessed lights be added to an existing ceiling?
Yes, retrofit recessed lights can be installed in existing ceilings without major structural changes. A licensed electrician can assess your ceiling type and run new wiring from your electrical panel. Retrofit cans work well in finished spaces where cutting large holes for traditional fixtures would cause excessive disruption. The installation process depends on your attic access and ceiling material.
Are LED recessed lights dimmable?
Most LED recessed lights are dimmable, but not all. Check the fixture specifications before purchase. Dimmable LEDs require a compatible dimmer switch and proper wiring. A recessed lighting dimmer switch installation must match the fixture’s dimming capability to avoid flickering or buzzing. Your electrician can verify compatibility and install the correct dimmer type for your LED fixtures.
How many recessed lights do I need in a room?
The number depends on room size, ceiling height, fixture output, beam spread, size of light and how the room is used. Recessed lights are often spaced several feet apart, A standard 10-by-10-foot room often uses about four recessed lights, while larger rooms may use six or more. The final number depends on ceiling height, fixture brightness, beam spread, room layout, and how much light the homeowner wants.